One of the key features of FL Studio is its ability to seamlessly export stems, which plays a very important role in the lives of music producers and sound engineers as it gives them creative control over the sounds from different instruments.
The ability to export stems separately allows for greater flexibility in post-production and collaboration, as each stem can be processed and edited independently without hampering other instrumental sounds in the same track. This blog will cover everything you need to know about exporting stems in FL Studio.
What Are Stems And Their Need In Music Production?
Simply put, stems are the building blocks for any music producer. Each instrument is recorded in a separate track, and these song components are comprised of various audio files collectively known as stems. You might think it’s similar to music quantization but its a different concept.
If you haven’t understood its significance already, just imagine working with other music producers, engineers, or musicians on the same track when you want to get it remixed or add a particular instrument to a pre-recorded track. Stems can help the other user to minimize the sounds of other instruments using the stems of the same instrument. It is also crucial when a sound engineer is creating the master track.
Other than the commonly known benefits of knowing how to export stems in FL studio, there are other benefits of exporting stems. Stems can be useful even in live performances. With stems, users can have an elevated level of control over the various elements in their mix. This is mainly useful for electronic musicians and DJs. This feature in FL Studio is very similar to randomizing velocity of a song.
Now that you know the importance of stems, let us teach you how to export stems in FL studio.
How To Export Stems in FL Studio: Step By Step Guide
Before we take you into the steps to export stems in FL studio, we want to put out some basic things for you. The most important while exporting stems is to organize them with suitable names properly.
Organizing stems will increase the efficiency of your work and even the people you will collaborate with. No one wants to figure out which stem is for which instrument. We mentioned this already while explaining how to add drum kits to fl studio. This is the same.
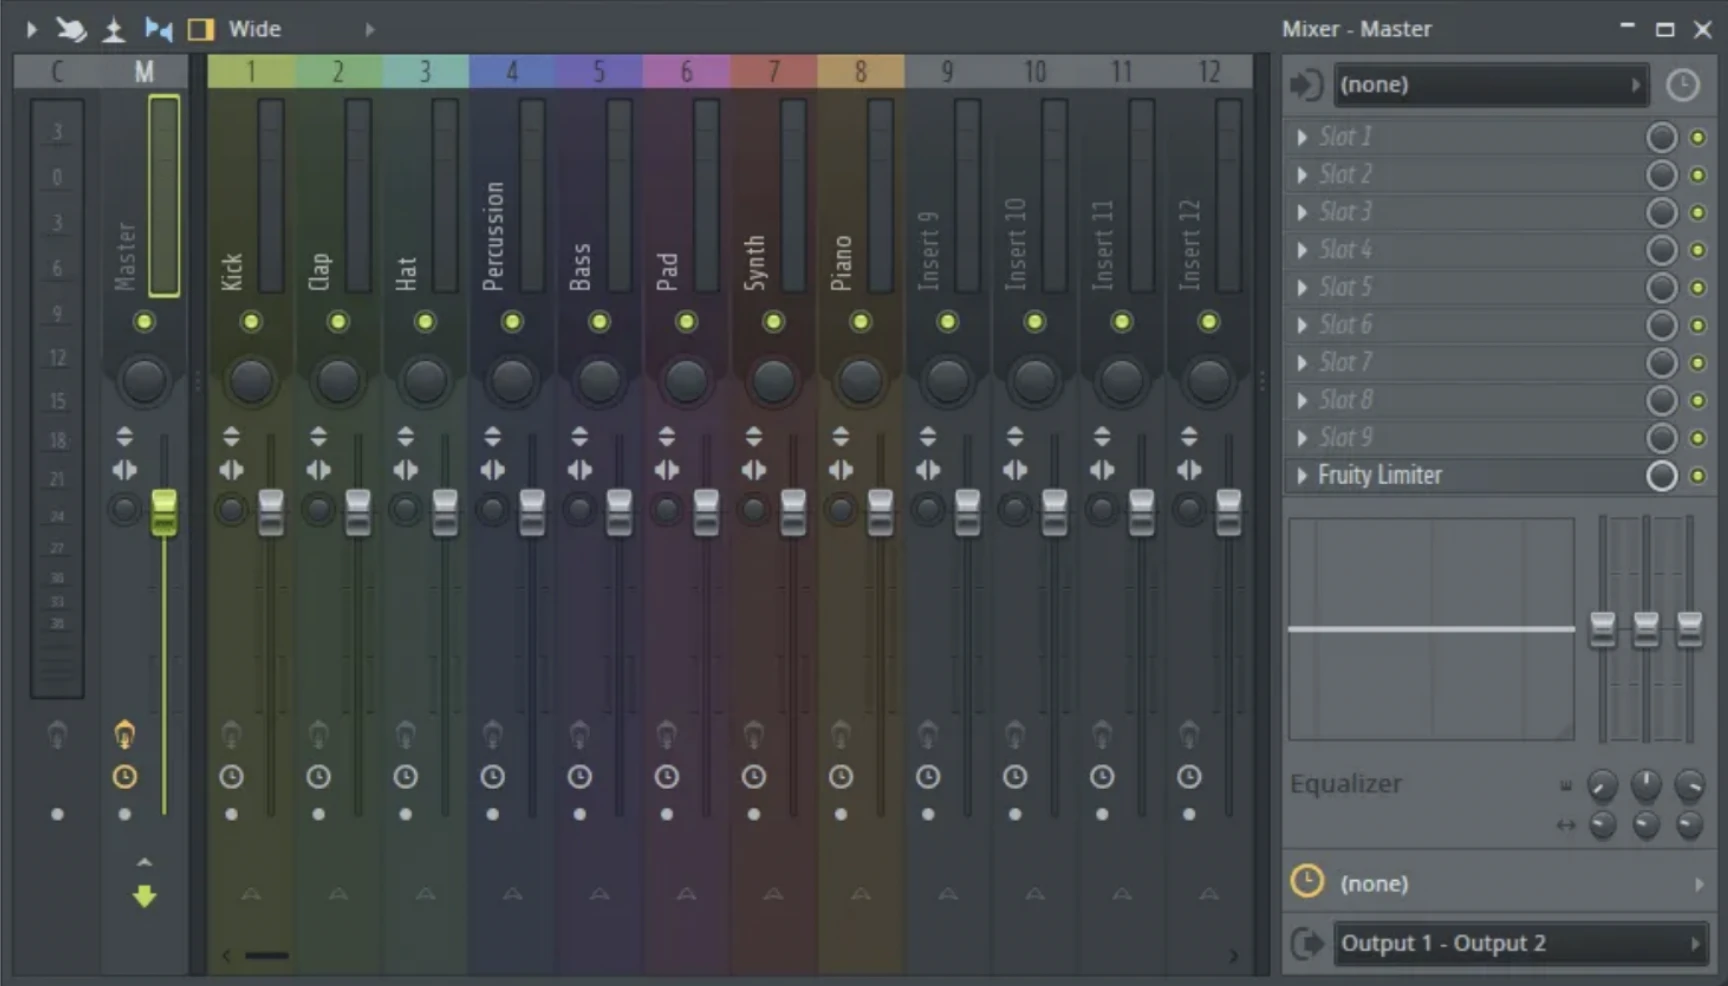
Step 1: Organize Your Mixer Channel
Before exporting stems, ensure the mix in your FL studio is properly set up. Each instrument or element in your mix should always be placed on a separate channel in the FL Studio mixer. To open the mixer, you can press F5 on your keyboard.
It is important to place every instrument or element on a separate channel to allow the users to export each stem individually without getting any bleed from other elements in the mix.
PS- You can use the channel splitting tool in FL studio to separate elements in your mix.
Step 2: Set Up Stem Export in the Mixer and Adjust Settings
To set up the stem export in FL Studio, select the channel you want to export, right-click and select the "Export as stem” option. Here you will have to name the stem. Repeat this process for each channel in your mix that you want to export as a stem.
Before exporting the stems, you need to make sure you use the right export settings to get the perfect out for you and your collaborator. Also, make sure to select a format that is compatible with the software you plan to use for post-production.
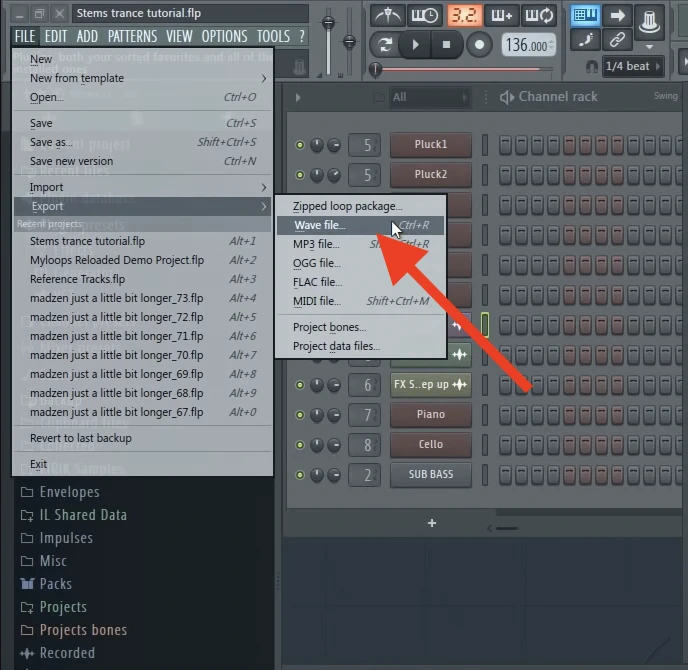
To do this, go click on the “File” menu.
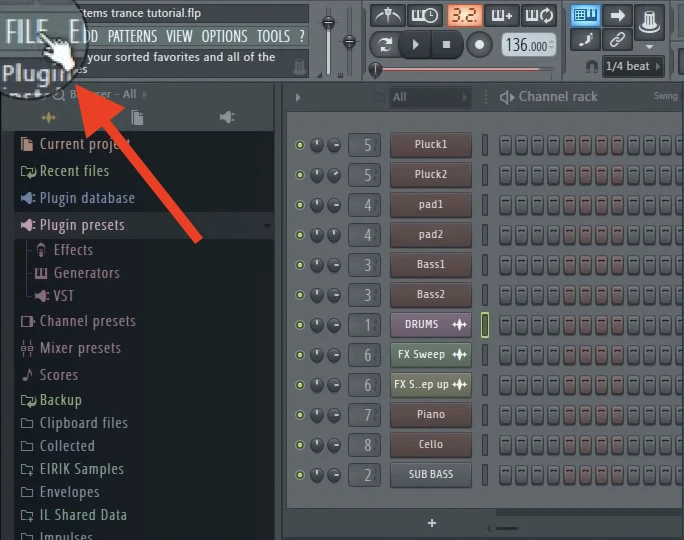
Now click on “Export”,
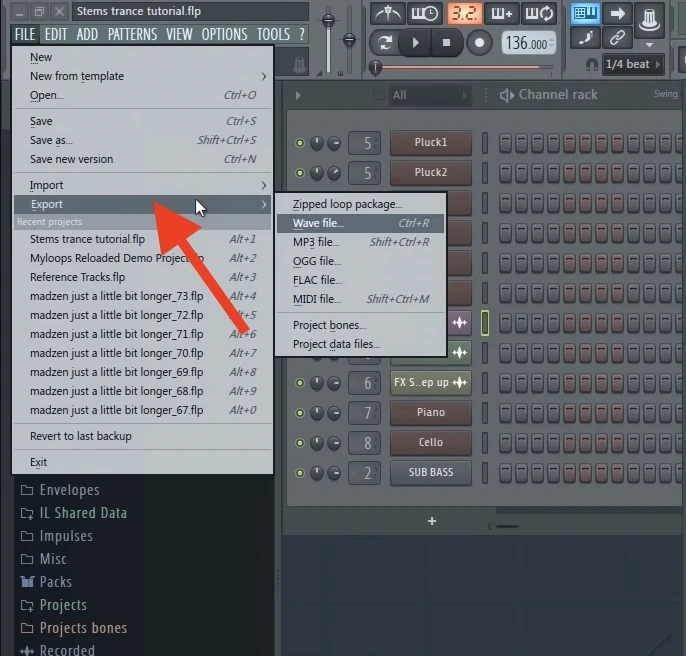
From the drop down menu select “WAV file”
Once you have followed the above steps, FL Studio will ask you for the location where you want to save your stems. Once you select the location, a setting dialogue box will appear. There are several setting options you can choose from which are explained below.
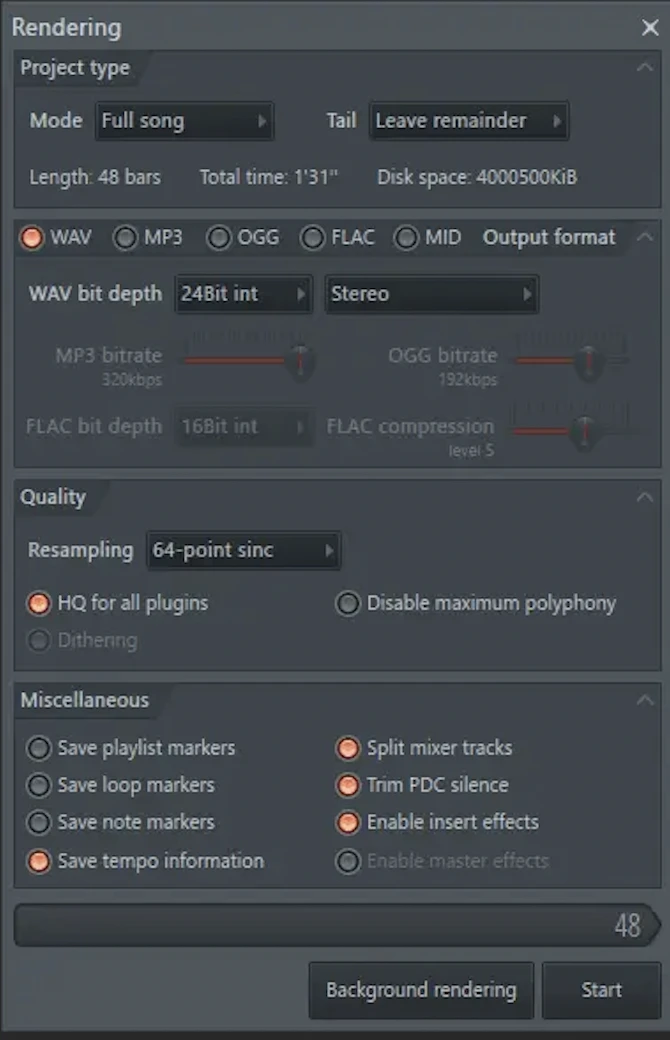
In the “Project Type” tab, the set mode option allows you to choose the length of the stems in the song. In the “Tail” option, select “Leave remainder” which will continue the render length till the reverb or delay ends.
In the “Output Format” tab, there are four options, WAV, MP3, OGG, FLAC, and MID. Speaking from the bottom of our hearts, always choose WAV until and unless you are asked for a different output format.
You also can choose the bit depth of the output stems. In most cases, the choice of bit depth mainly depends on the sound engineer’s preference, so ask him if you don’t know exactly the right choice to make.
There are other “miscellaneous” settings to choose from. These settings are mostly kept untouched, but you should talk to your collaborator if they want something specific.
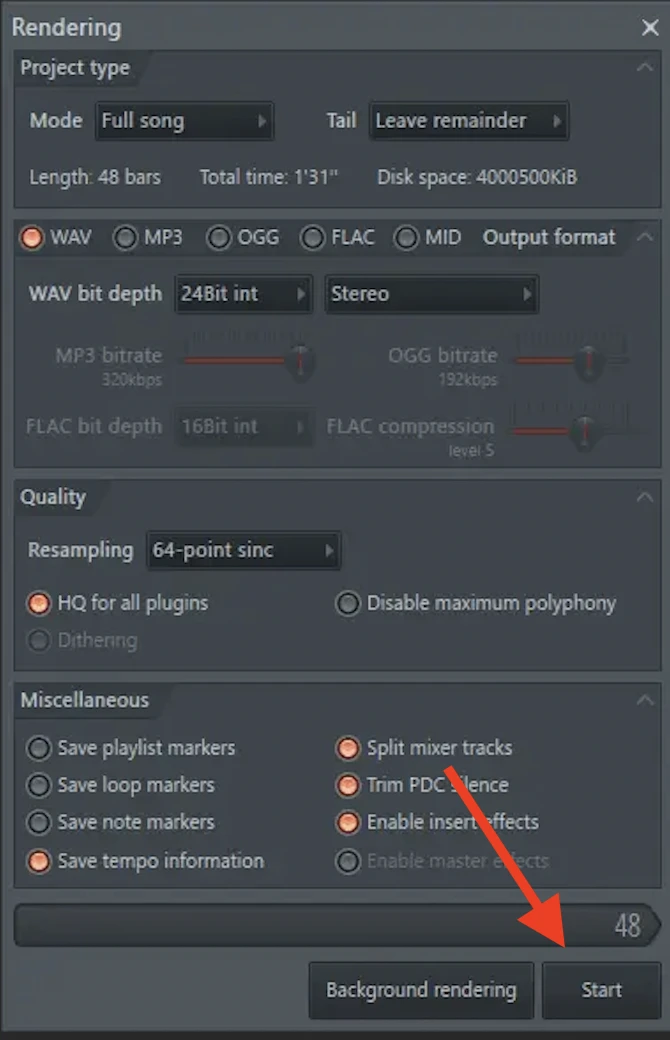
Step 3: Exporting The Stems
Now that we have changed the settings and made things the way we want to, it is time to get to the final step on how to export stems in FL studio.
Click the "Start" button on the same dialogue box, and FL Studio will start exporting each stem as a separate audio file, saved in the location we specified earlier. The time taken to export these stems can vary depending on your system’s configuration and the export settings.
How To Send Large Stem Files To Someone?
Now that you have learned how to export stems in FL Studio, it is also important to know how to send those files properly.
Depending on your music track, there can be a large number of stem files, and sending them as it is can take a lot of time. But there is an easy fix to it. All you have to do is compress the files.
By compressing, we don’t mean losing the quality, compressing by creating a zip folder will contain all the data while making the file size compact.
To Zip Stem Files
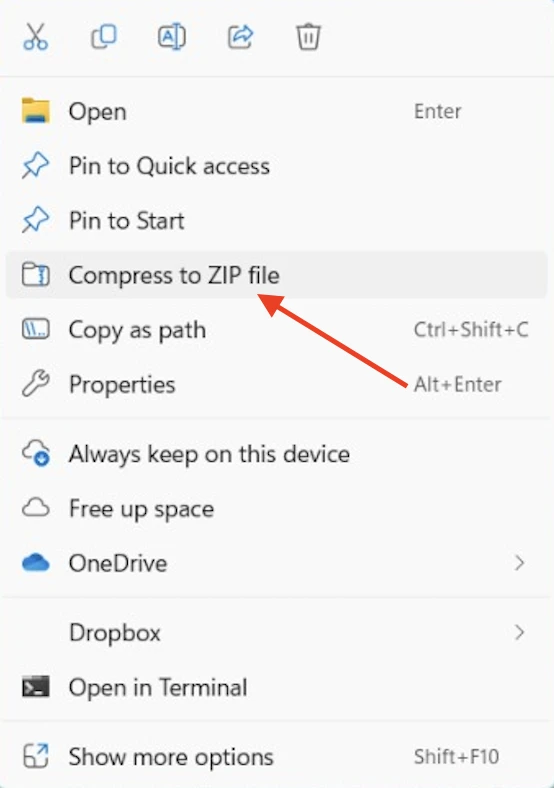
Using A Windows Device
Select the folder with the stem files, right-click, and choose “Compress to ZIP File” from the drop-down menu. That’s it. Windows will automatically start compressing your stem folder.
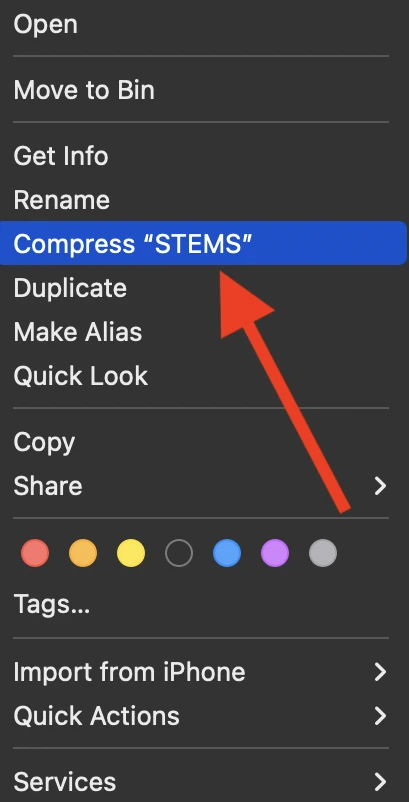
Using a macOS Device
It is as easy to zip files on a mac as it is on a windows device. Select the folder, right-click, and choose “Compress to X” where X is the name of your existing folder.
Now that you have your zip file ready, you can either send them to the receiver using online cloud services like Google Drive, SendGB, or Mediafire or use external hard drives.
Conclusion
If you have followed the steps we have mentioned in the previous section properly, you should have learned how to export stems in FL studio and are ready to experience a new level of professional music production.
Irrespective of the fact that exporting stems in FL Studio is a very straightforward process it is an extremely useful feature whether you're a beginner or an experienced music producer.