If you want to learn how to record vocals in FL Studio, you have come to the right spot. FL Studio is undoubtedly one of the most popular DAW software that is used by amateurs as well as by professionals around the world. But the best thing about the software is that it also allows users to record sound, be it system sounds or mic audio, in extremely crisp quality!
Recording vocals is one of the most important steps in making a good music track. We all had gone through times when we wanted a particular vocal style but could not find the right thing anywhere. FL Studio is a solution to all those miserable times. Today’s blog will discuss how to record vocals in an FL studio step-by-step.
Can You Record Vocals on FL Studio?
Yes, you absolutely can. FL Studio is a complex piece of software that might be overwhelming for people who do not know what they are doing with the software. The software is a little tricky with all the different buttons and options to choose from. This is why we are writing this blog on recording vocals in FL Studio. Once you practice enough, we can guarantee you will get the right hold and know how to record vocals in FL Studio in no time!
How To Record Vocals in FL Studio
If you want to learn how to record vocals in FL Studio, this guide is a good starting point. The step-by-step guide will make it easy for you to understand the fundaments when you want to know how to record vocals over a beat in FL Studio. So, let’s get started.
Equipment
Whenever someone talks about recording vocals in FL studio, the first thing that comes to my mind is to have the right pieces of equipment. By this, I do not mean that you can not create music if you don’t have the best microphone or the boom stand. All I am putting out is that there are things required for you if you want to know how to record vocals over a beat in an FL studio.
Microphone
We shouldn’t need to mention this, but we still will. You need a microphone to record anything in the first place. So, get your microphone handy before we get into the details.
Mic Stand
A boom stand or a mic stand is a good thing to have if you want your recording session to go on smoothly. If you don’t already have one and are not a professional, we suggest you buy a clip-on stand that clips to the edge of your table and can be adjusted according to your liking. This makes managing the mic on your desktop table an easy process.
XLR Cable
For those who don’t know what an XLR Cable is. XLR stands for “External Line Return” which means you need to connect your microphone to the audio interfacing hardware. Without an XLR cable, your computer would not be able to receive any signals from your microphone. If you don’t have one, we do not recommend using a USB convertor because no matter how good the converter is, some quality is bound to be lost.
Additional Equipment
Audio Interface
If it comes to technicality, not everyone needs an audio interface. But, again, every piece of equipment depends on the quality of the product you need. If you want high-quality sound, you will need an audio interface. People use an adapter to plug their microphones directly into the computer, but the problem is that you will have to depend on your system’s sound card for the quality of input. Highly recommended if you want to record professional-quality vocals.
Pop Filters
A pop filter will avoid pops in your recordings. There are several reasons why pops appear in the recording, the most common of which is the direct flow of air in the mic.
Step 1: Setting up the record track
To set up your record track. Go to the playlist section on the left side, click on the first track (or whichever track you want your audio to be recorded to), right-click, and from the drop-down menu, go to audio track> insert
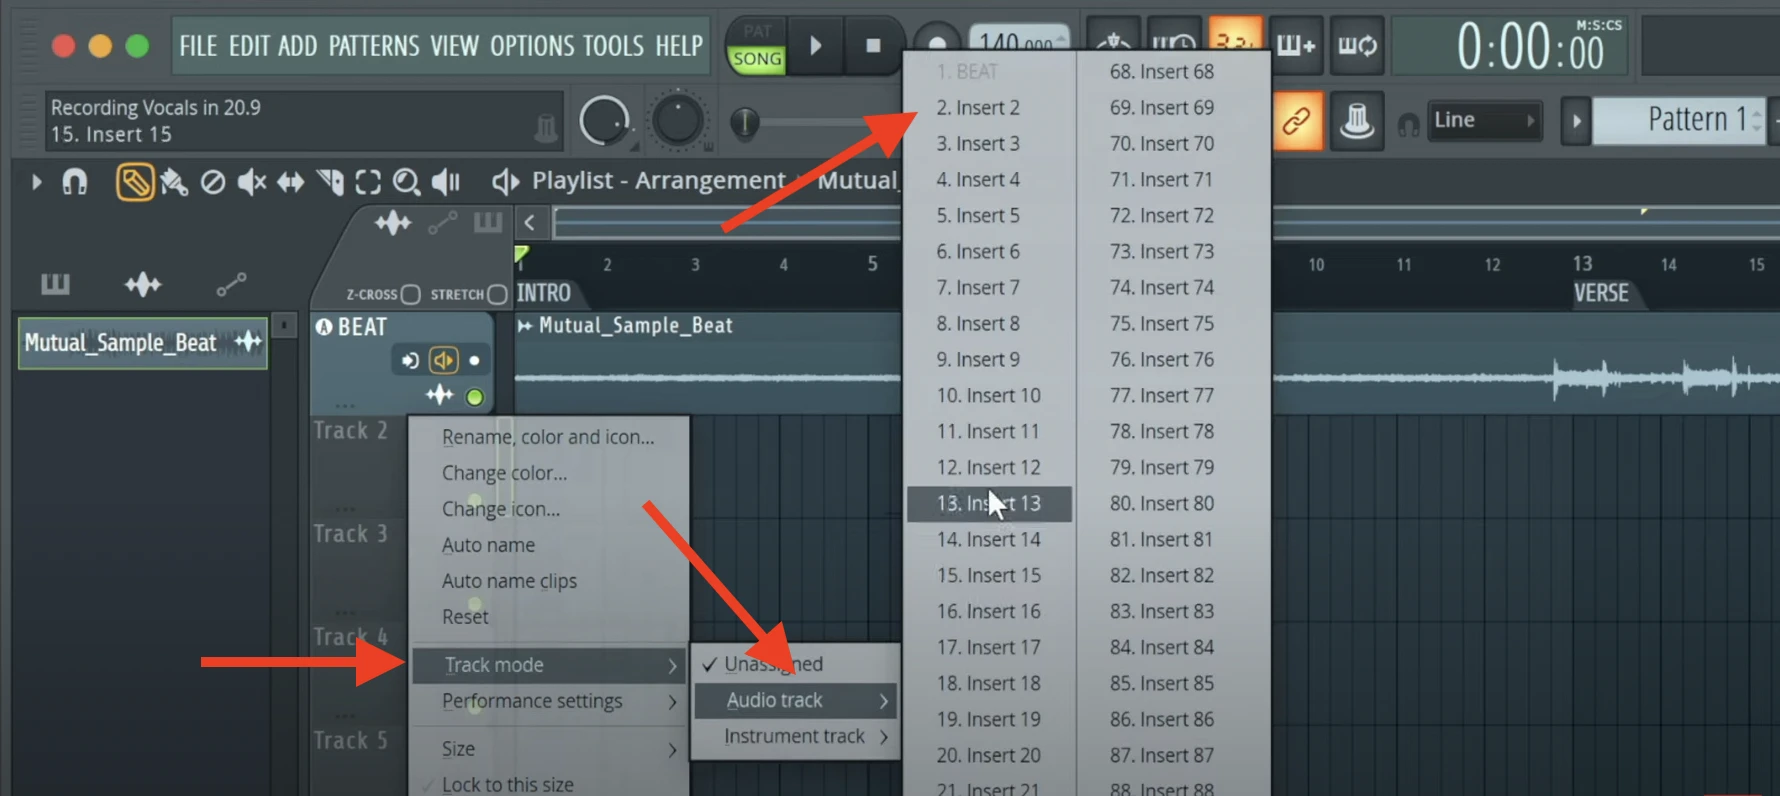
Note- If you have selected the channel as stereo, your playlist will appear on the left side of your window.
Step 2: Audio Interface Settings (If You Are Using A Audio-Interface)
To ensure the audio interface is set up properly, open up the settings by pressing F10. Once the dialogue box appears, go to the “Audio” tab and select the “ASIO” driver. If you don’t have the ASIO driver, you can download it from the internet.
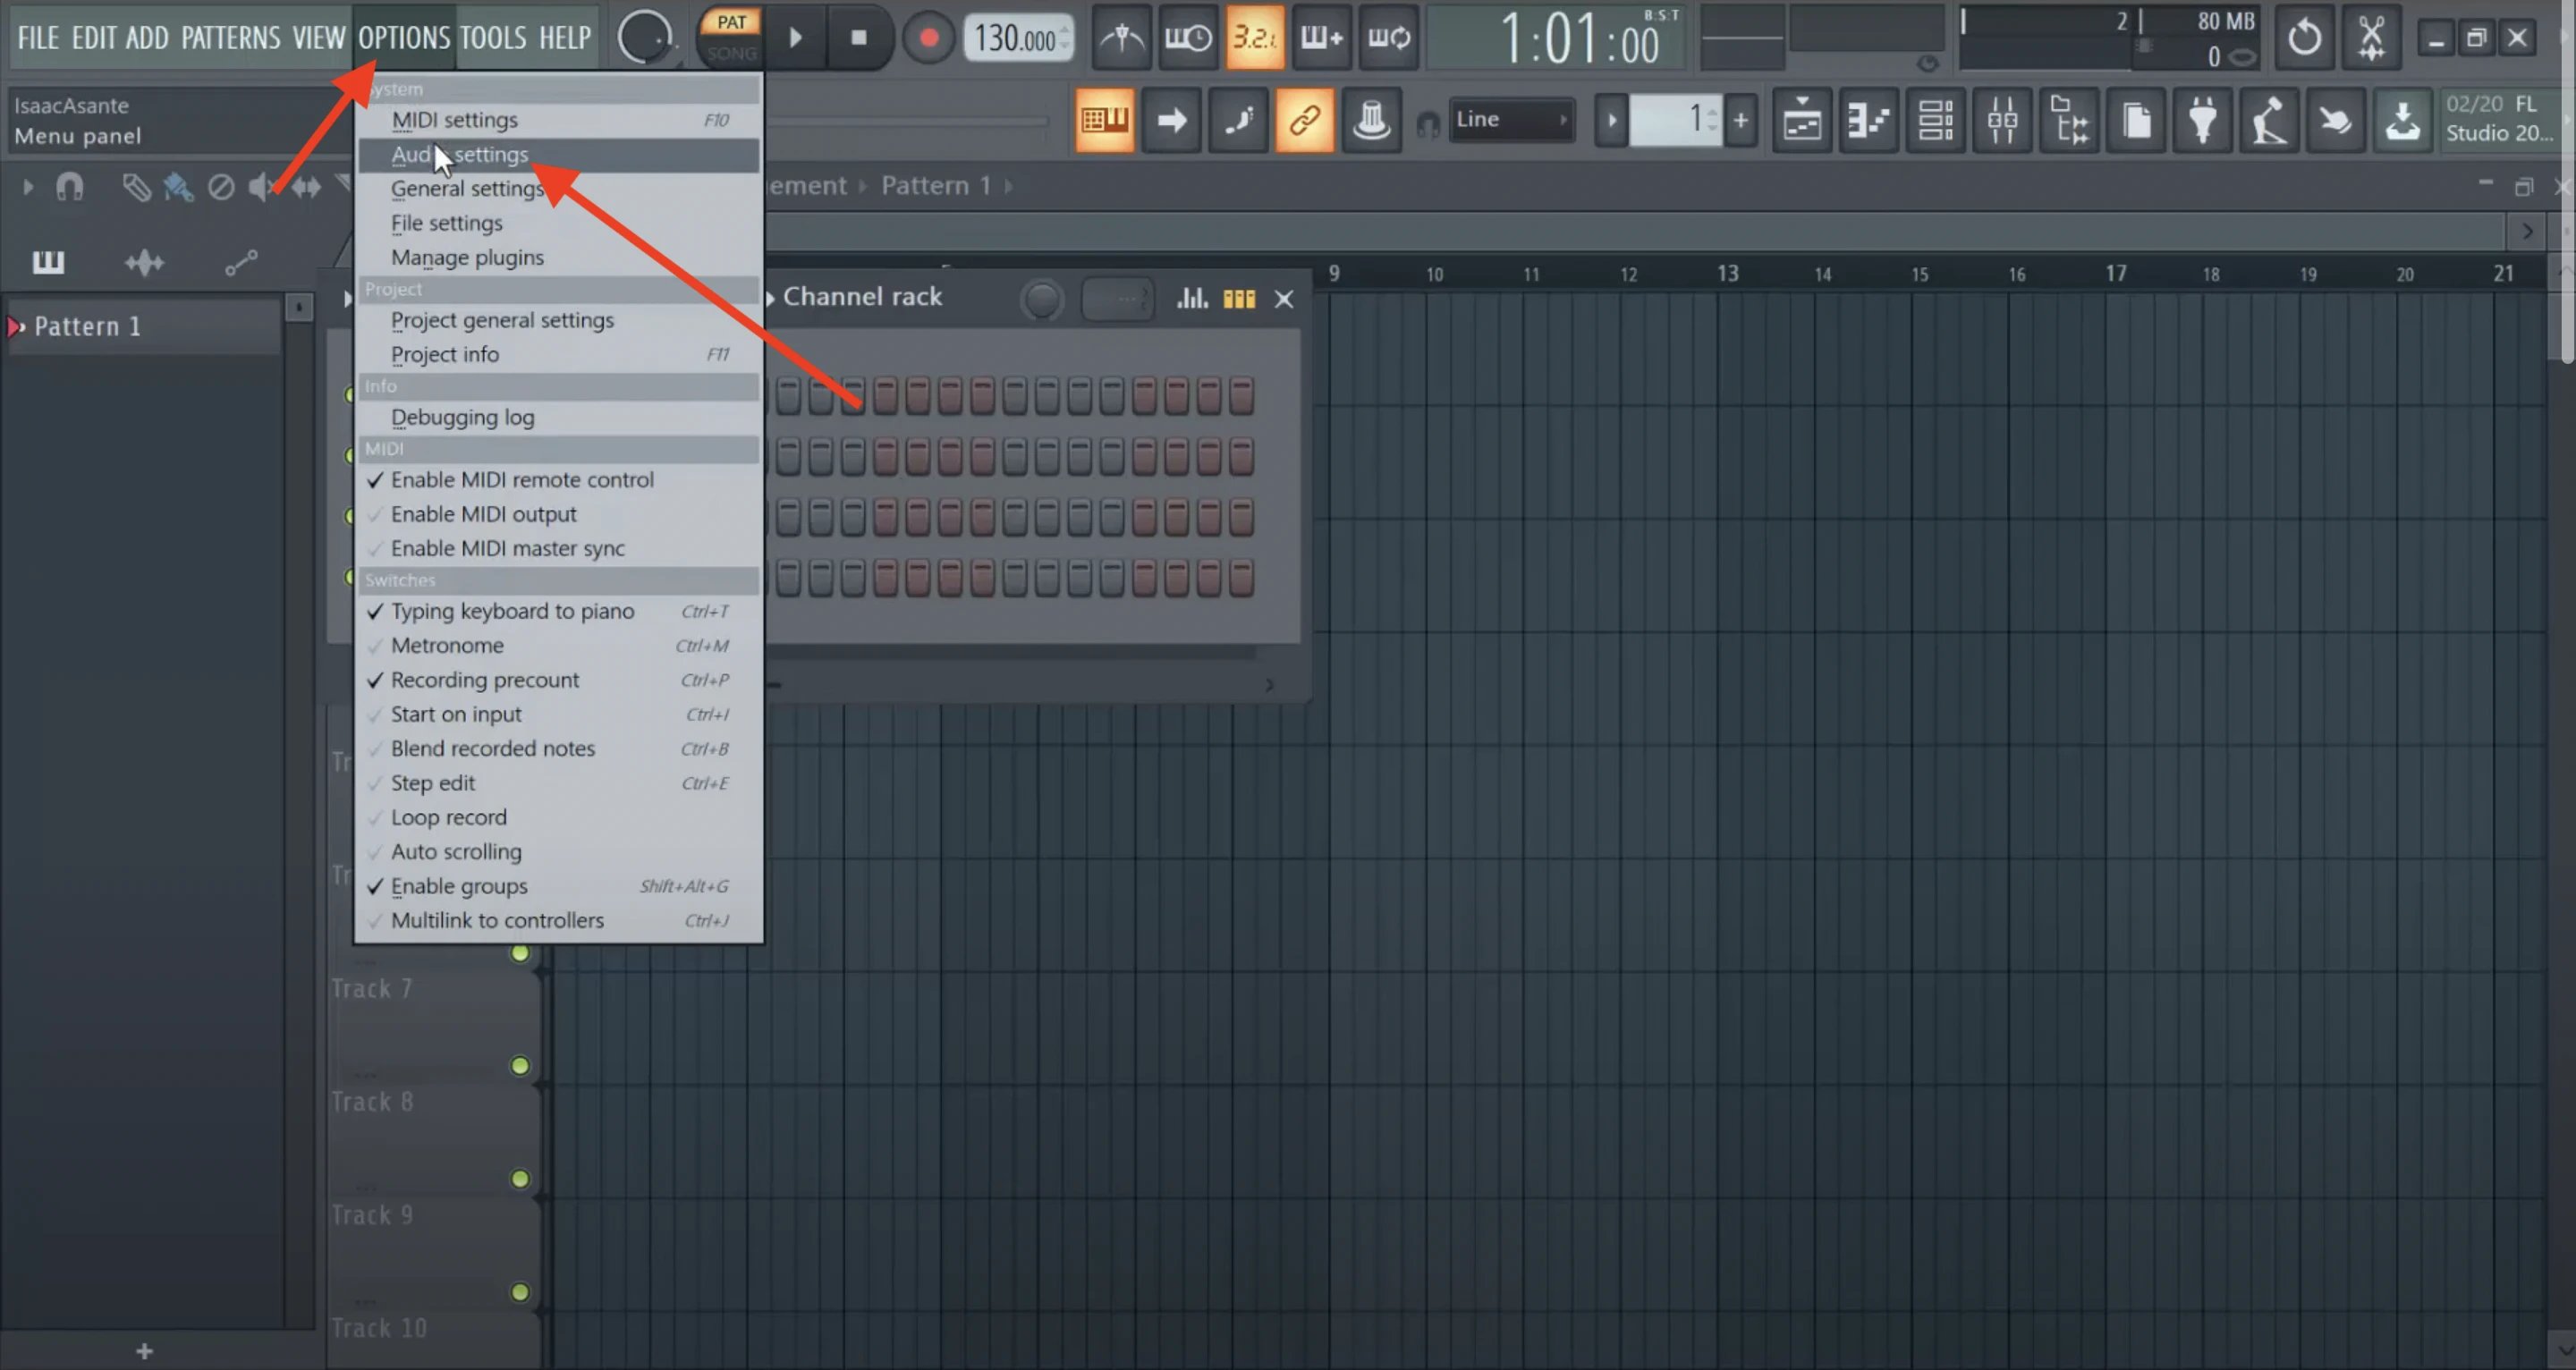
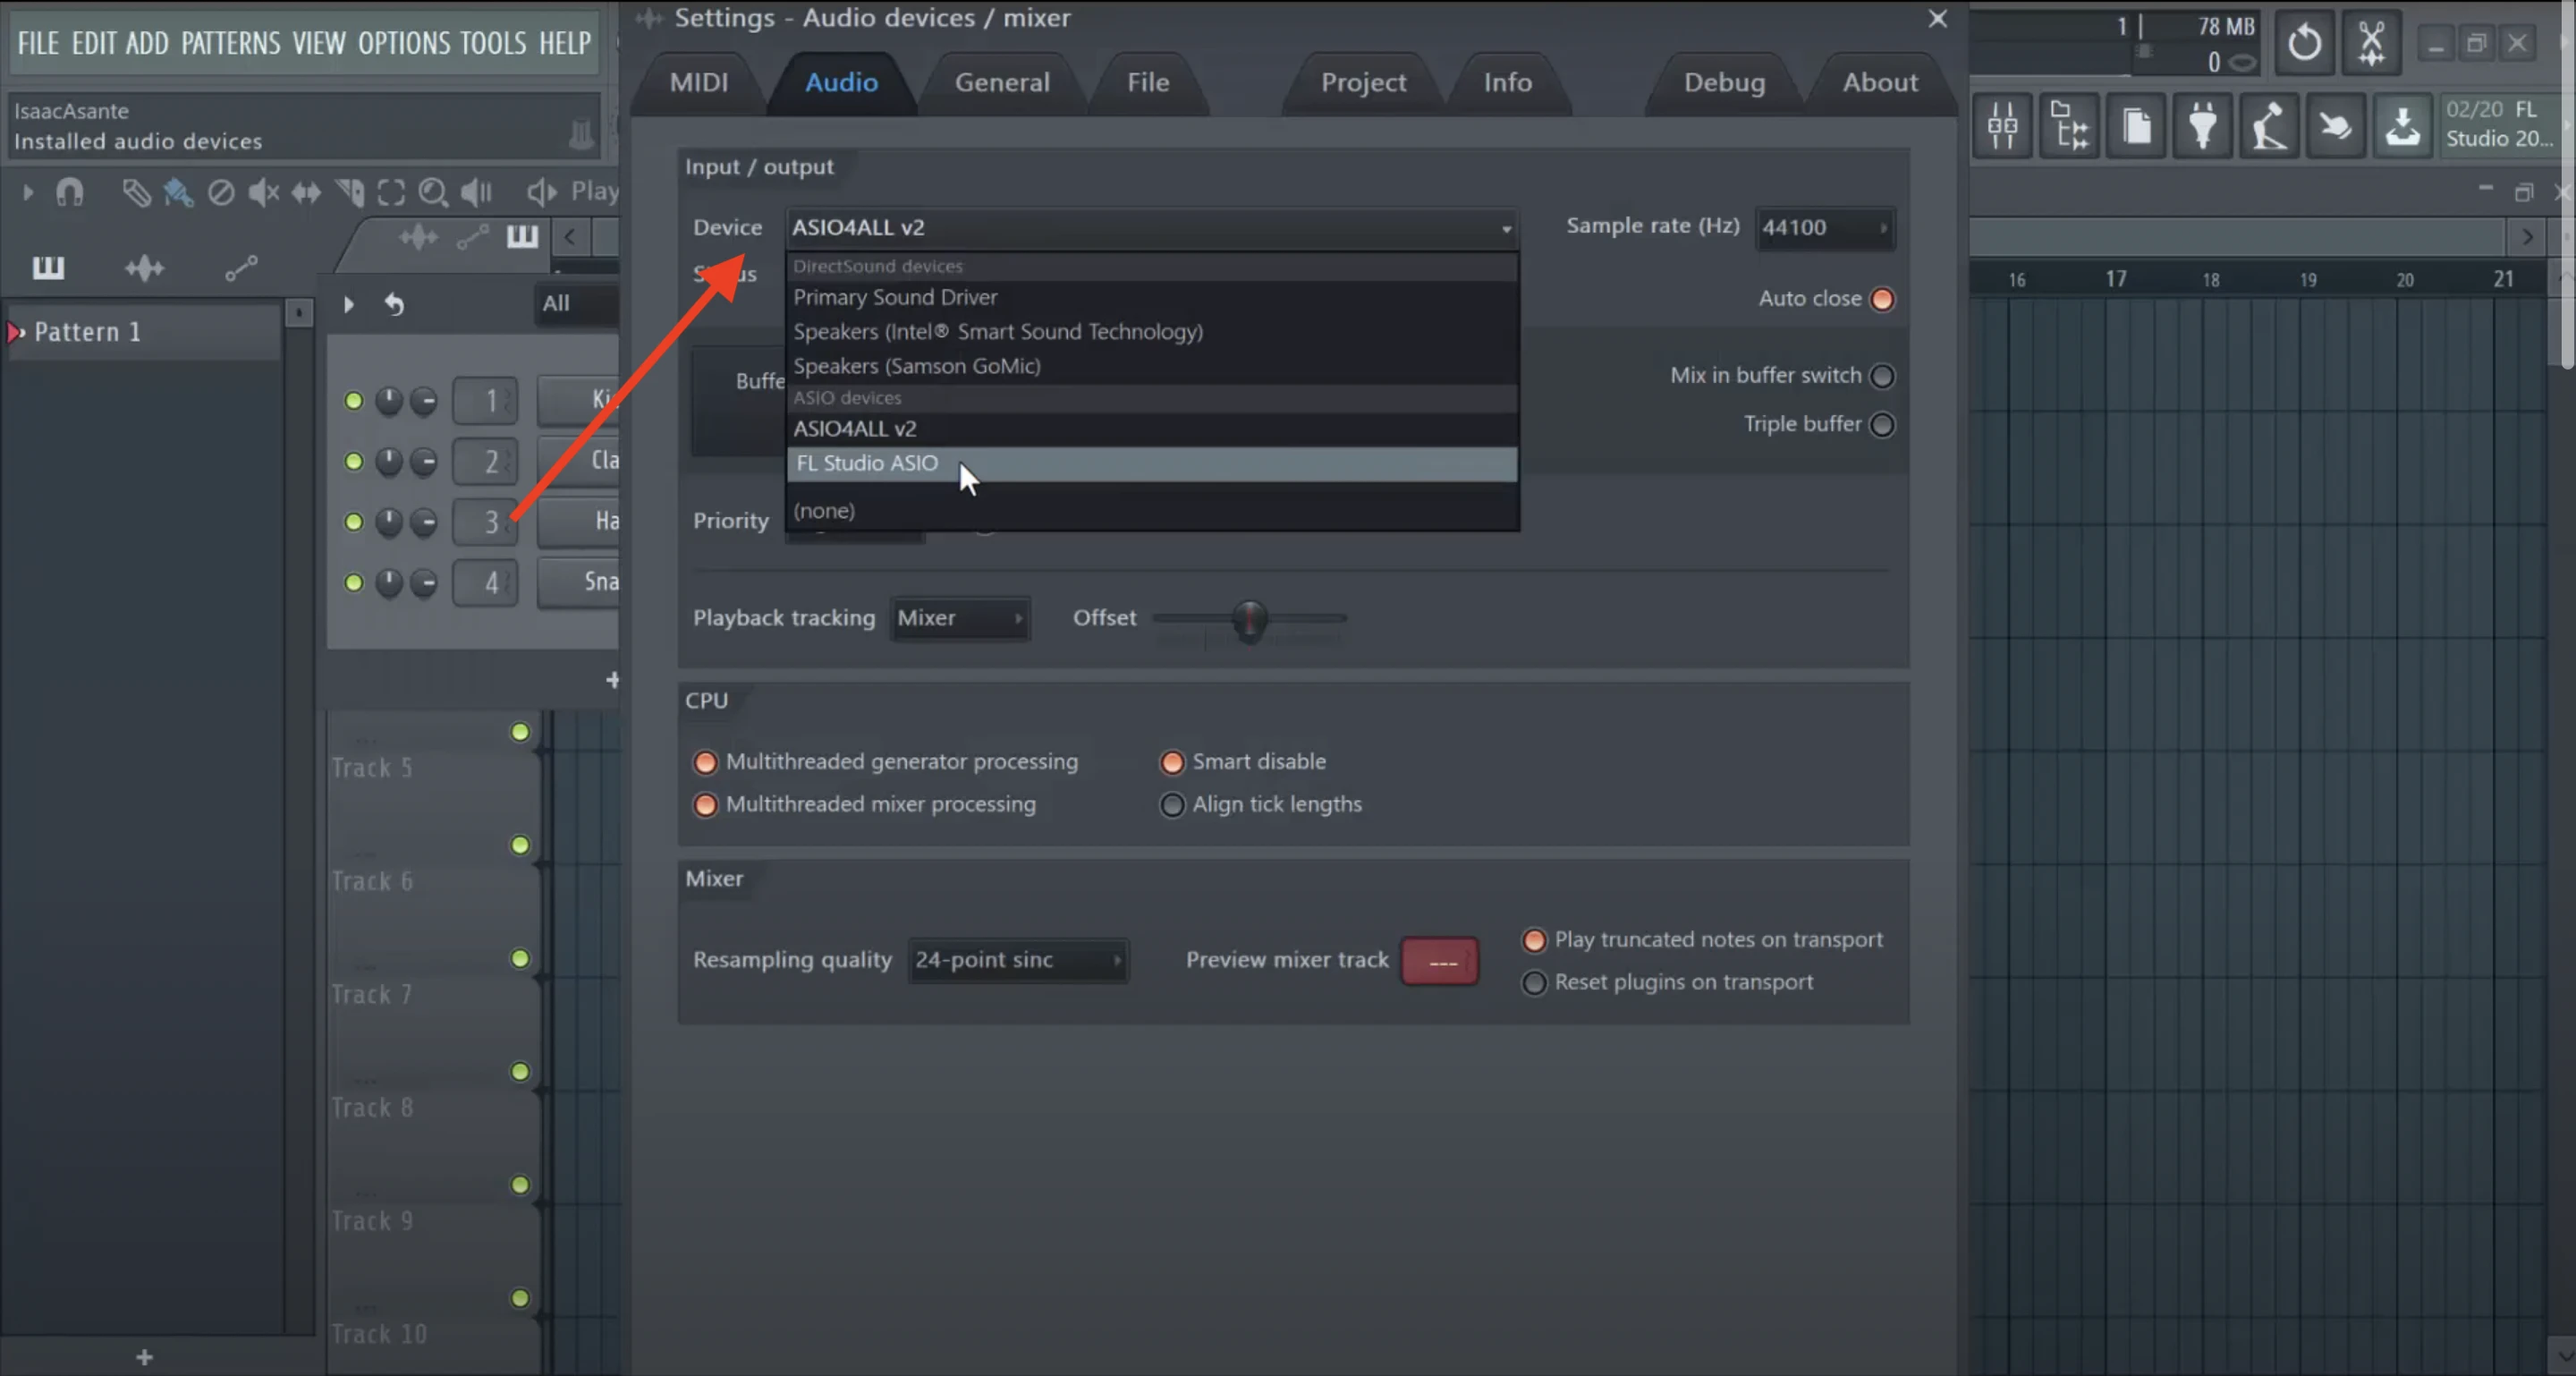
Tip- Keep the selected buffer size to the least possible while recording your vocals in FL studio to avoid any delay when listening to the sound in your headphones
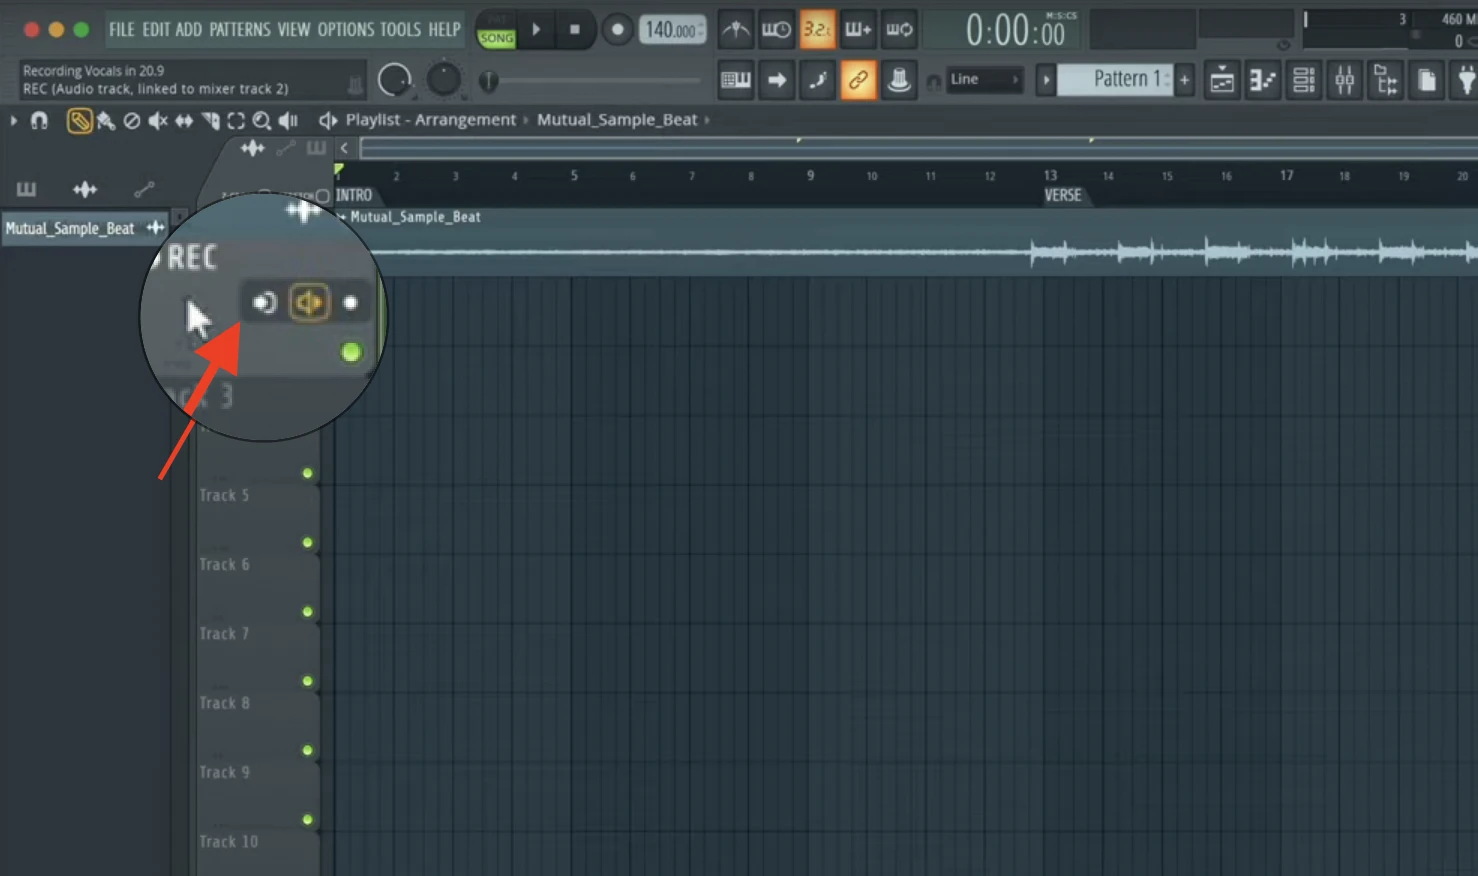
Step 3: Set Your Input Source
This step is important because FL studio doesn’t automatically recognize where your audio input is coming from and most importantly what to do with it in the first place.
At the beginning of your track, you will find an audio input source button (look at the screenshot for reference). Click on it, and from the drop-down menu choose your input source.
Step 4: Add Vocals Effects (Optional)
If you want to add any vocal effects to your recording, this is the step where you do it. Ensure you add the desired vocal effects to the selected channel in the previous step.
Note- The higher the number of vocal effects you choose to add, the more the latency
Step 5: Recording The Vocals
Now that you have learned almost all the steps to record vocals in FL studio, let us get to the final one. This is where you create the magic.
On the track, where you found the input source button, the third button is the “arm/disarm” button. Without tipping this on, your knowledge of how to record vocals in FL studio will be a waste of time as you won’t be able to record anything.
Once you turn it on, you will see the signal bars right next to the track, showing the levels of input the system is receiving.
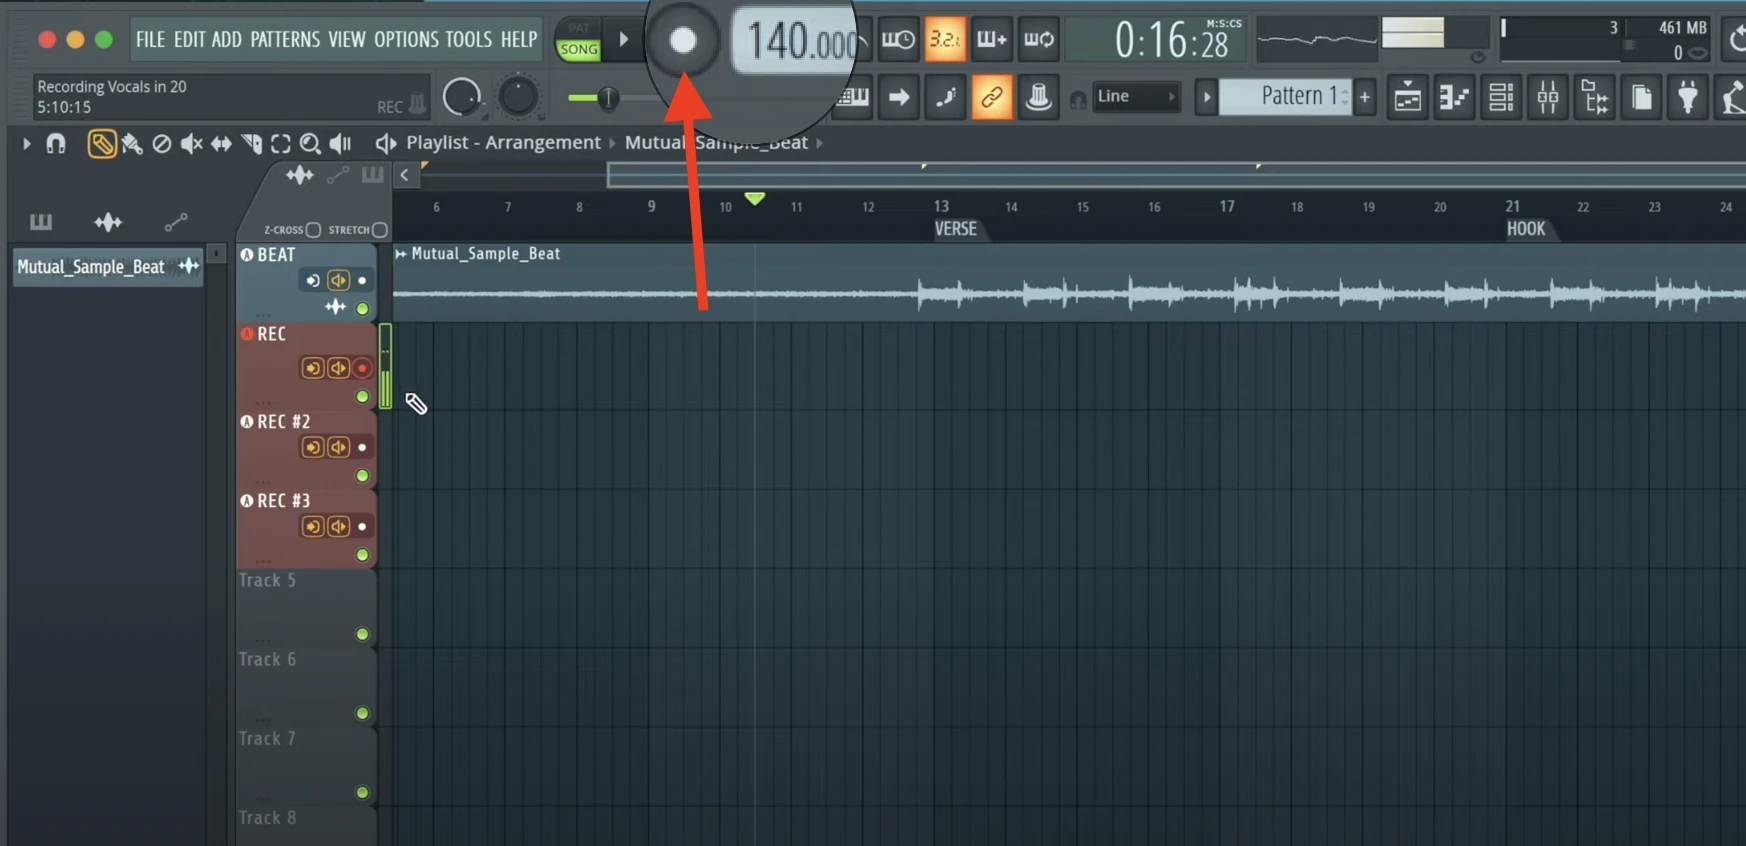
Now that everything is ready, all you have to do is Press the “Record” button on the top bar or press the hotkey “R” to start recording vocals in FL Studio. Voila, you have just begun recording your vocals in the FL studio!
When you want to stop recording vocals in FL Studio, you can hit the “record” button again, or you can press the “R” button again. To review the recorded vocals, you can press the “Space bar”.
Tips- If you are using headphones, make sure that the sound levels are proper and no sound is leaking from the speakers otherwise your microphone will catch it and your vocals would be ruined the instant they are recorded.
Step 6: Export The Recorded Vocals
This step is fairly easy and will complete your journey of learning how to record vocals in FL Studio. To export the recorded sound, select the vocal track you want to export (as of now only one track can be exported at a time), go to the File tab, from the drop-down menu select export and then select the desired file type. If you want a high-quality sound file, make sure you go for a WAV file.

Beginner Tips on How to Record Vocals in FL Studio
- When setting up the gain for your microphone, usually, the spots are around -10dB for ideal recording vocals.
- Add markers on your timeline to make sure that you do not jumble up your record vocals. This tip will help you save a lot of time when you are using FL studio to record vocals in the future.